Why Timely Repair of Flashing Around Chimneys Protects Your Entire Roof
Key Takeaways
- Damaged flashing is a leading cause of roof and chimney leaks and must be addressed quickly to avoid extensive water damage.
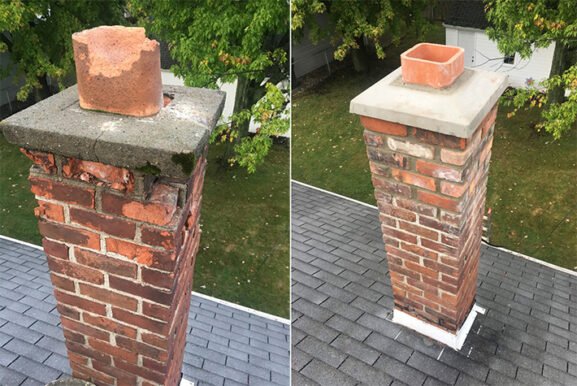
- Proper flashing repair helps extend the lifespan of both the chimney and roofing materials by keeping moisture out.
- Common signs of flashing failure include rust, gaps, and water stains near the fireplace or attic.
- Hiring a qualified professional ensures the repair uses proper materials and techniques for long-term protection.
Understanding the Purpose of Chimney Flashing
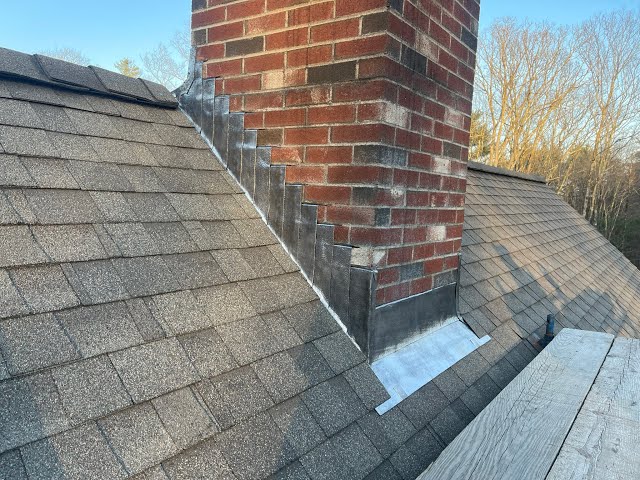
Chimney flashing is the thin metal barrier installed where the chimney meets the roof. Its job is to direct water away from vulnerable seams and prevent moisture from leaking into your home. Flashing typically consists of step flashing along the sides of the chimney and counter flashing embedded into the brickwork to form a watertight seal.
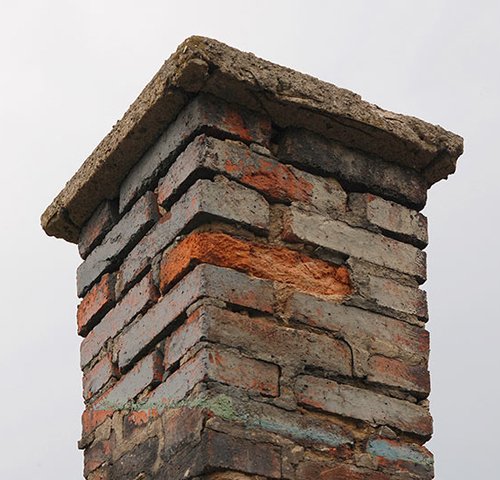
When the flashing becomes damaged or begins to deteriorate due to age, poor installation, or harsh weather, it can no longer do its job effectively. This allows rainwater and melting snow to seep into the attic, roof sheathing, and even into your ceilings and walls, often going unnoticed until major damage has occurred.
What Causes Flashing Around the Chimney to Fail
There are a number of reasons why flashing can become compromised over time. One common cause is poor workmanship during the original installation. Flashing that isn’t properly layered or sealed will eventually pull away from the surface it’s meant to protect.
Another factor is corrosion, particularly if the flashing is made from lower-grade materials. Galvanized steel, for instance, is cheaper but more prone to rusting compared to higher-end materials like copper or stainless steel. Additionally, extreme freeze-thaw cycles in regions like the Northeast can cause both masonry and metal to expand and contract, weakening seals and joints.
Settling of the chimney structure or shifting of the roof deck can also loosen flashing. Even wildlife, such as birds or squirrels, may dislodge or damage flashing as they search for shelter or nesting areas.
How to Spot Problems Early
Detecting flashing issues early can save you from expensive roof repairs down the road. Start by visually inspecting the area around your chimney at least once a year or after major storms. Look for any of the following red flags:
- Rust or discoloration on the flashing material
- Loose, lifted, or missing flashing components
- Water stains or bubbling paint on interior walls near the chimney
- Visible gaps between the flashing and the masonry or roof
- Mold or mildew odors in the attic
If you’re unsure what to look for or can’t safely access your roof, it’s a good idea to have a professional chimney or roofing inspection. These inspections are especially important for older homes where the chimney may not have been maintained regularly.
The Right Way to Repair Chimney Flashing
Fixing chimney flashing is not a simple DIY task. A proper repair requires precision and knowledge of both roofing and masonry techniques. In most cases, the old flashing will need to be removed completely and replaced rather than patched or sealed.
A reliable repair job includes:
- Removing existing flashing and inspecting the surrounding chimney and roof for damage
- Installing new step and counter flashing with weather-resistant fasteners and sealants
- Embedding counter flashing into mortar joints for a permanent seal
- Applying a waterproofing membrane around the base for added protection
These steps ensure the repair will stand up to rain, wind, and snow without failing prematurely. Materials matter here too. For example, flashing made of lead-coated copper offers excellent durability and longevity, particularly in harsh climates.
For deeper insight into chimney flashing standards and proper installation practices, the International Association of Certified Home Inspectors (InterNACHI) provides technical guidance that underscores the importance of doing this work correctly.
When to Schedule Repairs for Best Results
The best time to repair flashing is during dry, mild weather. Spring and early fall are ideal because they offer stable temperatures that allow sealants and mortar to cure properly. Waiting until winter or during rainy seasons can complicate the job, delaying the repair and increasing the risk of further water damage.
If you’ve recently noticed signs of moisture in your attic or around the chimney, it’s better to act sooner rather than later. Water intrusion can lead to hidden rot, mold, and even structural weakening in the roof deck. Proactive maintenance is always more cost-effective than emergency repairs.
Why Proper Flashing Repairs Are Worth the Investment
Though it may seem like a small part of the roofing system, chimney flashing plays a huge role in keeping your home dry and structurally sound. Ignoring it or choosing quick fixes can leave your home vulnerable to water damage and costly repairs.
Professional flashing repair ensures that your chimney continues to function as intended, with proper sealing and integration into the roof system. It also protects the value of your home by preventing avoidable deterioration in both the chimney and the roofing materials.
Investing in quality flashing repair now can save you thousands of dollars down the line. And more importantly, it offers peace of mind knowing your home is shielded from one of the most common — and preventable — sources of roof leaks.
Maintaining a Leak-Free Chimney Over Time
Routine maintenance is key to preserving the integrity of flashing and preventing future issues. Schedule annual chimney inspections, especially before the start of winter, and ask your technician to examine the flashing closely.
Keep the surrounding roofing materials in good condition as well. Loose shingles, clogged gutters, or deteriorated mortar joints can all contribute to flashing problems over time. By staying proactive, you can ensure your chimney system stays leak-free and efficient year-round.