Why Flashing Repair Around Your Chimney Matters More Than You Think
Key Takeaways
- Damaged or poorly installed flashing can lead to costly water damage inside your home
- Flashing repair plays a crucial role in sealing the gap between the chimney and roofline
- Regular inspections can help catch flashing issues before they become major repairs
- Hiring qualified professionals ensures the repair is done correctly and safely
Understanding the Role of Chimney Flashing
Chimney flashing is one of those components homeowners often overlook—until water starts dripping into the attic or stains appear on interior walls. Flashing is the metal barrier that seals the intersection between your chimney and roof, preventing water from sneaking into your home. It’s installed in layers, typically consisting of step flashing, counter flashing, and base flashing, all designed to deflect water away from vulnerable areas.
In regions with frequent rainfall or harsh winters, such as the Northeast, this protection is critical. Ice dams, high winds, and heavy storms can all weaken flashing over time, creating the perfect opportunity for leaks to develop unnoticed.
Signs You Might Need Flashing Repair Around the Chimney
Identifying flashing problems early can save you thousands in repairs. Here are some of the most common red flags:
- Water stains on ceilings or walls near the chimney
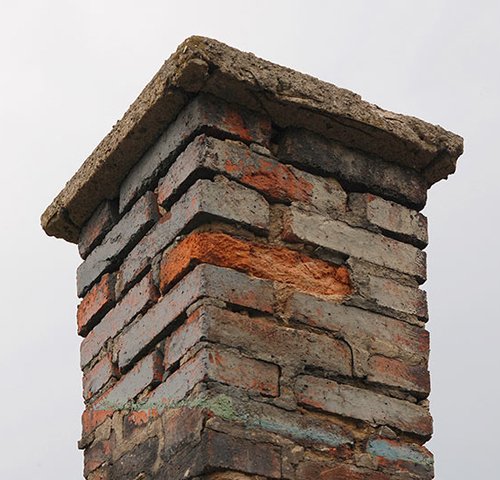
- Rusted or bent flashing metal visible from the roof
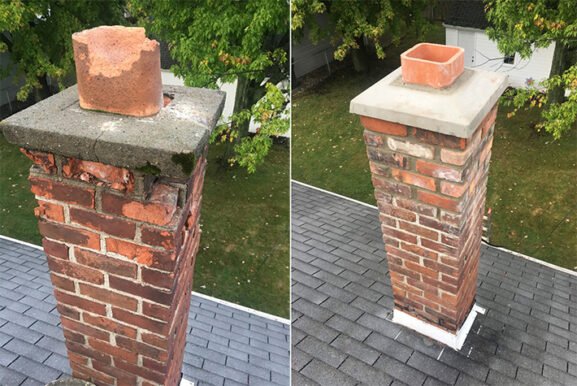
- Missing mortar or cracked brick near the flashing zone
- Musty smells or mold growth in the attic or upper floors
- Debris collecting in gaps between the chimney and roofline
Even if you don’t see obvious signs, aging homes or those exposed to extreme weather should have their flashing inspected every couple of years. In many cases, the damage isn’t visible until it’s extensive.
What Causes Flashing to Fail
Chimney flashing is designed to be durable, but it isn’t indestructible. A variety of factors can lead to flashing failure:
- Improper Installation: If the flashing was not integrated correctly with both the roofing and the chimney masonry, it won’t provide a watertight seal.
- Weather Exposure: Snow, ice, and wind gradually loosen the flashing or cause metal fatigue.
- House Settling: Movement in the structure of the home or chimney can disrupt the tight fit of flashing.
- Corrosion: Cheaper flashing materials can rust over time, especially in coastal or humid environments.
- Roof Replacement: Sometimes flashing is damaged or not reinstalled properly during roofing work.
Because these issues develop slowly, most homeowners don’t catch them until water damage appears indoors.
How Professionals Repair Chimney Flashing
Flashing repair is more than a patch job. Done correctly, it requires removing old or faulty materials, addressing any underlying masonry or roof damage, and integrating new flashing so it functions as part of the roofing system.
Step 1: Assessment and Removal
Professionals begin with a full inspection to determine the extent of the problem. This may include checking for internal water damage, decayed wood beneath the roof shingles, or compromised masonry. Old flashing is carefully removed to avoid damaging surrounding materials.
Step 2: Surface Preparation
Any crumbling mortar is repaired, and the chimney surface is cleaned so new flashing can adhere properly. In some cases, additional waterproof membranes are applied for extra protection.
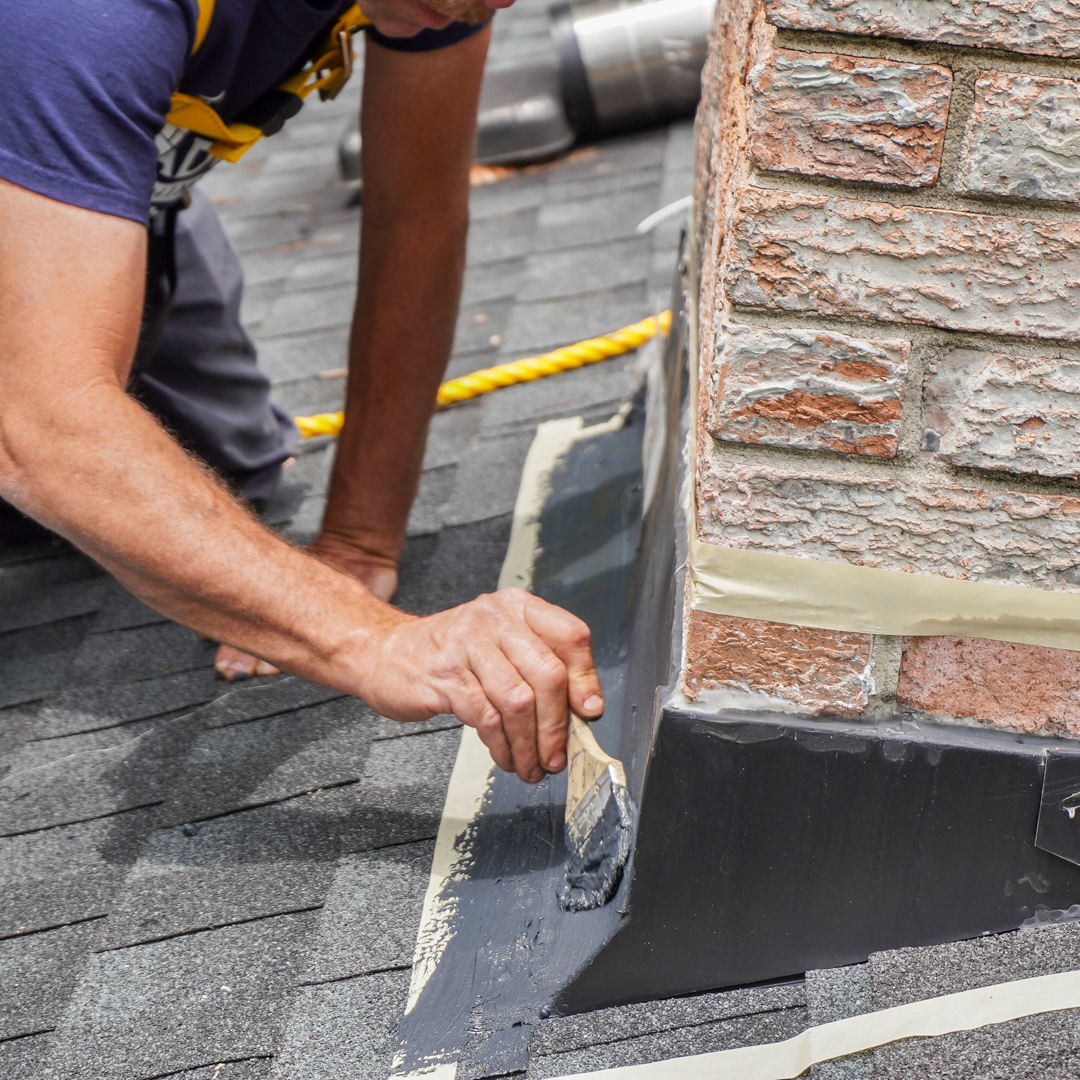
Step 3: Flashing Installation
New flashing is installed in overlapping layers to create a watertight seal. Typically, step flashing is woven into the shingles, and counter flashing is embedded into mortar joints or chimney grooves to deflect water downward.
Step 4: Sealing and Testing
All seams and nail holes are sealed with high-quality roofing cement or silicone, and a water test may be conducted to ensure no leaks are present.
This process requires both roofing and masonry skills, making it important to work with contractors who are experienced with chimney structures.
Why DIY Flashing Repair Can Be Risky
While it’s tempting to save money with a do-it-yourself approach, flashing repair around chimneys is not the place to cut corners. Most homeowners lack the tools, materials, and know-how to perform a long-lasting, watertight installation.
Improper repairs can lead to:
- Ongoing leaks and further structural damage
- Voided warranties on your roof or chimney
- Potential safety hazards from working at heights
- Missed signs of deeper issues such as brick deterioration or mold
The safest and most reliable way to protect your home is by hiring a licensed roofing or chimney professional. Look for someone with experience in both systems, as they’ll understand how to create a flashing solution that lasts.
The Real Cost of Ignoring Flashing Issues
Ignoring flashing problems often results in much bigger and costlier problems down the road. According to the National Association of Home Builders, water intrusion is among the most expensive home maintenance problems—and chimney flashing is a frequent source of such damage.
Unchecked leaks can rot roof decking, weaken structural framing, destroy insulation, and cause mold growth. What starts as a $400–$800 repair could quickly balloon into thousands of dollars in remediation and rebuilding. And if mold is involved, the cleanup can be even more extensive and hazardous to your health.
Choosing the Right Materials for Long-Term Protection
Flashing materials vary widely in cost and durability. Here are some of the most common choices:
- Aluminum: Affordable and lightweight, but prone to corrosion over time unless properly coated
- Galvanized Steel: A bit more durable than aluminum but still susceptible to rust in coastal or wet climates
- Copper: Expensive but extremely durable and corrosion-resistant; often used in historic or upscale homes
- Lead: Rarely used today due to safety concerns, though still found in older homes
While copper flashing may cost more upfront, its longevity often makes it the better investment over time—especially in areas where weather is a constant concern.
How Often to Inspect and Maintain Chimney Flashing
You don’t need to be on your roof every month, but a regular inspection schedule can go a long way in preventing major issues. Ideally, have your chimney and roof professionally inspected:
- Every 2 to 3 years for homes in moderate climates
- Annually for homes in regions with snow, ice, or high winds
- After any major storm, hurricane, or roofing project
Homeowners should also monitor the interior of their homes for subtle signs of water infiltration, such as bubbling paint, soft drywall, or unexplained odors. Early detection is key to minimizing damage.
Final Thought on Protecting the Roofline Connection
The intersection where your chimney meets the roof is one of the most vulnerable points on your home. Flashing is your first line of defense against water intrusion in that critical space. Keeping it in top shape protects not just your roof but also your ceilings, walls, and structural framing.
Whether you’re dealing with a minor flashing defect or need a full replacement, treating the repair as a priority can save significant money and stress in the long run. The peace of mind that comes with a dry, damage-free home is worth the effort.