How to Repair Chimney Flashing and Prevent Future Water Damage
Key Takeaways
- Damaged chimney flashing is one of the most common causes of roof leaks and structural water damage.
- Timely flashing repair prevents costly issues like rot, mold growth, and chimney deterioration.
- Basic flashing repairs can be DIY-friendly, but some cases require a qualified roofing or masonry expert.
- Regular inspections, especially before rainy seasons, help extend the life of both your roof and chimney.
Understanding Why Chimney Flashing Matters
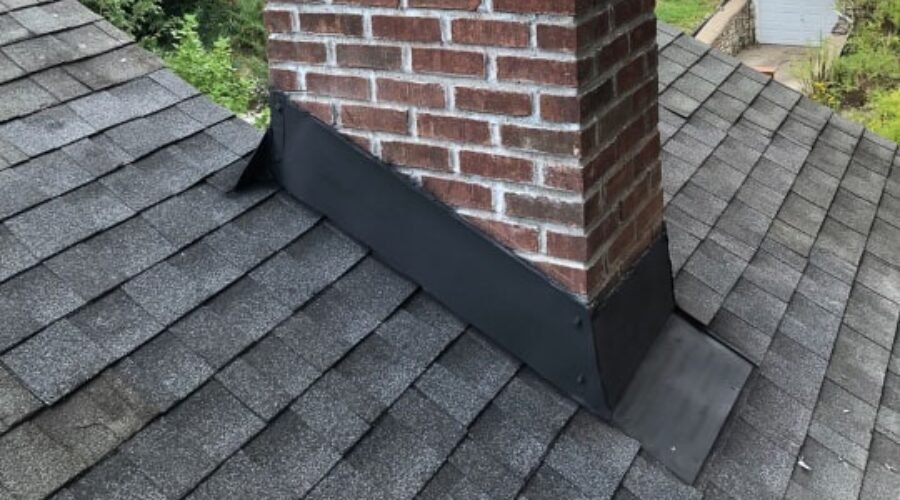
Chimney flashing is a crucial component that seals the space where your chimney meets your roof. Without proper sealing, rainwater can slip through the gaps and cause significant internal damage. Over time, even a small leak can lead to mold growth, wood rot, ruined insulation, and cracked masonry.
Flashing is typically made of aluminum, galvanized steel, or copper and consists of step flashing along the sides of the chimney and counter flashing over the top. This layered system helps divert water away from the joint. When installed correctly, it should last decades. However, harsh weather, poor installation, and house settling can cause it to pull away or corrode.
That’s why knowing how to repair chimney flashing is essential for any homeowner looking to protect their property.
Signs That Your Chimney Flashing Needs Repair
Before you attempt any repair, it’s important to confirm that the flashing is the problem. Here are some clear indicators:
- Water stains on ceilings or walls near the chimney
- Dampness or mold in the attic
- Visible rust or holes in metal flashing
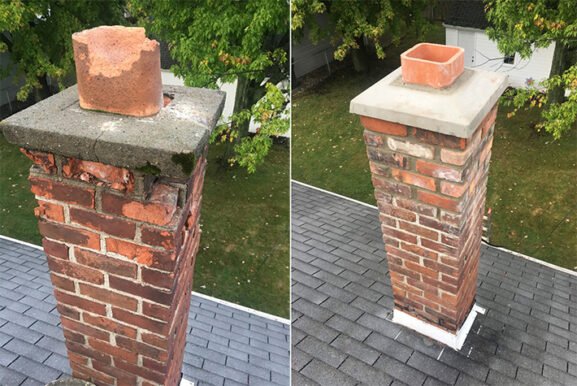
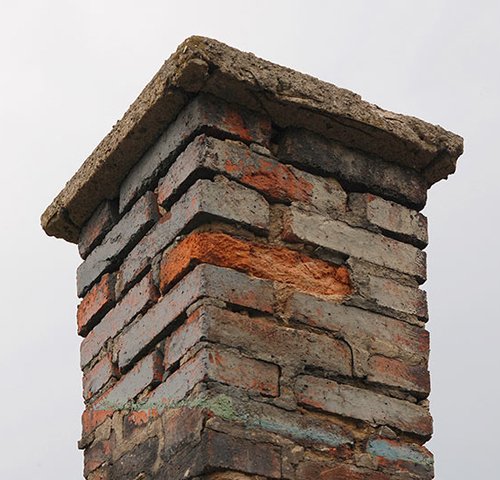
- Loose bricks or crumbling mortar around the chimney base
- Flashing that appears warped, detached, or lifting from the roof surface
If any of these signs are present, it’s time to take action before the damage spreads.
Step-by-Step Guide to Basic Chimney Flashing Repair
Repairing chimney flashing can range from a quick patch to a full replacement. If the damage is minor and you’re comfortable with heights and tools, you might be able to handle the repair yourself.
Step 1: Assess the Damage
Start with a thorough inspection of the chimney flashing. Use binoculars from the ground or climb carefully onto the roof if it’s safe. Look for cracks, rust, or separated seams.
If the flashing is only slightly lifting or the sealant is deteriorating, a patch repair may be sufficient. If the metal is missing, rusted through, or improperly installed, a full replacement is needed.
Step 2: Clean the Area
Use a wire brush to scrub away debris, old caulk, and rust from the flashing and chimney base. A clean surface ensures that new sealant or flashing adheres properly.
Step 3: Reseal with Roofing Cement or Flashing Sealant
For minor gaps or lifting edges, apply a generous bead of roofing cement or a high-quality polyurethane sealant along the seams and edges. Press the flashing down firmly and smooth out the sealant.
Make sure to cover any visible nails or holes. Avoid using silicone caulk, as it breaks down faster in outdoor conditions.
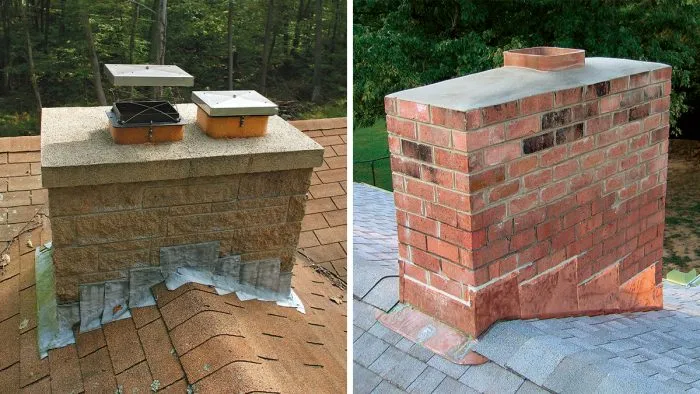
Step 4: Replace Damaged Sections if Necessary
If entire sections of flashing are missing or beyond patching, you’ll need to remove the old material and install new step and counter flashing. This process may involve temporarily removing some roof shingles and cutting into mortar joints.
This level of work can get complex and is best handled by a professional unless you have roofing experience. Improper installation can cause more damage and may void roof warranties.
When to Call in a Professional
While minor sealing or patching may be within reach of a handy homeowner, some flashing problems demand expert intervention.
You should consider hiring a professional if:
- The chimney flashing was poorly installed in the first place
- The roof slope is steep or unsafe to work on
- There is major water damage or structural deterioration
- You see multiple layers of flashing or evidence of past improper repairs
Experienced roofers or chimney masons have the tools and knowledge to match the existing roofing material and ensure a water-tight seal. This not only protects your investment but can also preserve your home insurance coverage.
Organizations like the National Roofing Contractors Association (NRCA) can help you find qualified professionals in your area who follow industry standards.
Long-Term Prevention Strategies That Work
After your flashing has been repaired or replaced, it’s wise to prevent future problems with simple maintenance.
- Inspect seasonally: Look at the flashing during spring and fall, or after storms. Catching early signs of damage helps avoid larger repairs.
- Keep the roof clear: Remove leaves, branches, or snow buildup that can trap moisture near the chimney.
- Seal masonry cracks: Water can still sneak in through deteriorating mortar joints or brickwork. Keep the whole chimney envelope in good condition.
- Gutter maintenance: Ensure gutters and downspouts are directing water away from the roof, not pooling near the chimney.
Regular attention to these areas supports the lifespan of your flashing and roof system overall.
The Role of Proper Installation in Long-Term Flashing Performance
Even the best materials won’t last if flashing is poorly installed. Problems often begin with shortcuts taken during construction or past repairs—like using roofing tar instead of metal flashing, or overlapping materials incorrectly.
Correct installation follows a layered approach that directs water away from vulnerable seams. This means using step flashing between every row of shingles, embedding counter flashing into mortar joints, and sealing all overlaps properly.
If you’re replacing flashing, insist that your contractor follows manufacturer and building code specifications. Don’t hesitate to ask for before-and-after photos of the work. A solid installation today could save you from water damage years down the line.
What Smart Homeowners Do After Repairs
After fixing your chimney flashing, stay proactive. Document the repair with photos and notes, especially if it was handled professionally. This helps during future inspections or insurance claims.
Schedule a full chimney inspection at least once a year, especially if you use a wood-burning fireplace. Inspections often catch issues not visible to the naked eye—like hidden leaks, loose mortar, or cracked chimney crowns.
This practice not only preserves your chimney but also helps you catch small problems before they turn into expensive projects.
Smart Repair Today Prevents Bigger Issues Tomorrow
Homeowners who stay ahead of flashing issues save themselves from bigger headaches down the road. Water damage is rarely isolated and can compromise framing, drywall, insulation, and even indoor air quality.
Repairing chimney flashing isn’t just about patching metal. It’s a small but vital part of your home’s waterproofing strategy. Whether you choose to tackle it yourself or bring in a trusted expert, doing it right the first time ensures peace of mind every time it rains.
Let your roof and chimney work together seamlessly—by giving chimney flashing the attention it deserves.